Wednesday, September 24, 2014

Cosplay Update

Hello cosplay followers, 

So, even though there are no conventions coming up (at least for the 211 days) I have already started my plans for the next cosplay. As most of you know, I moved to Chicago. Home of C2E2 each April. Now while I do understand that April is a rather far time away, I of course still have to get started on the cosplay decisions. 

And I have.

Drum roll please for the two final decisions (third one is still in the air) for my first C2E2 visit. 

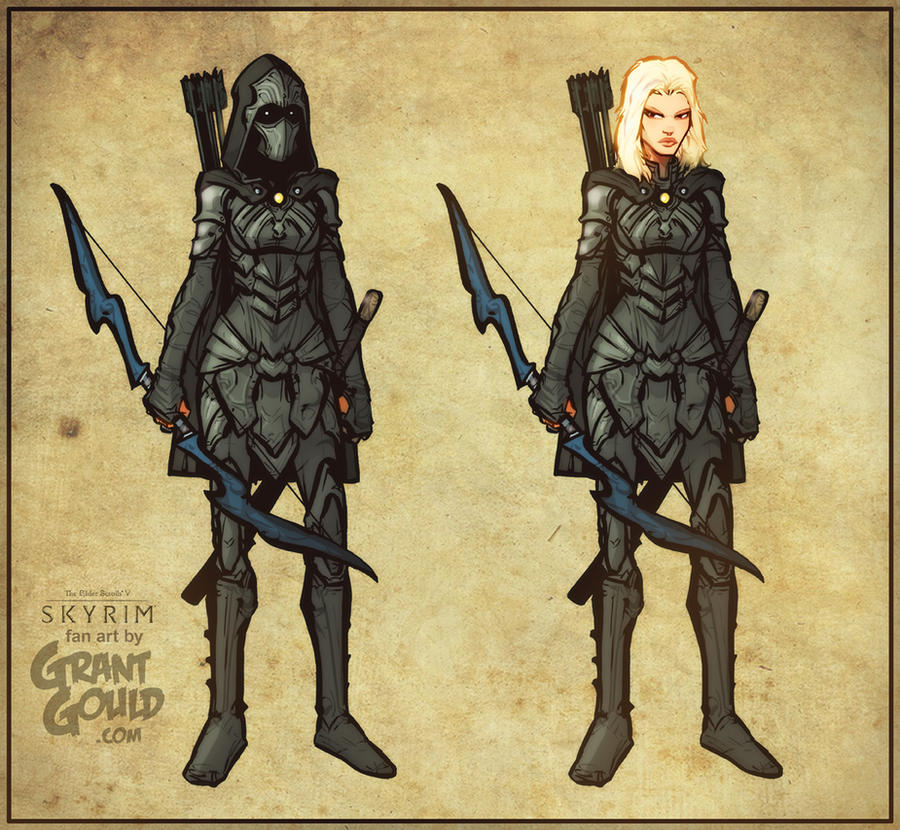
I am going with Nightingale Armor from Skyrim 


AND Thranduil from The Hobbit. Yes. It will be difficult. Yes. It will take time. And yes. It will look awesome as fuck. 


Obviously those two photos are not mine, one being a concept art for Skyrim, and the other being an actual picture of the wonderful human that is Lee Pace. My only hope is that I can embody that man and all he is, because that would be perfection. 

Anyways, just a quick check in for all you followers, 
Keep cosplaying

--Max

Tuesday, July 29, 2014

CosLog: NYE Installment #3!

Hello everyone, 
Welcome to some more progress pictures of the beautiful modern victorian dress. I added some new scalloped ruffles on the top part, and tonight I am hemming, sewing and then adding new straight ruffles on the bottom tulle area. 


This is a nice picture of the full thing, it also shows how it hangs which I like. 


This is an upclose picture of the two ruffled layers


This is what I hope it will look like in the end, I have the measurements on here for anyone who was wondering what they were. I would also add ruffles in one layer instead of the two like originally planned

I hope everyone has a great day, stay tuned tonight for hemming, stitching and then trying on! After that we move onto the bodice with boning and awesome corsetness. 

Much love! Happy cosplay!
--Max

Monday, July 28, 2014

CosLog: NYE Installment #2

HELLO AGAIN EVERYONE
ITS LATE AND I WANT TO SHOW YOU MY PRETTY COSTUME PROGRESS! YAY


This is a picture of the bustled parks put on the dress. Its rather hard to see, and I shall post a better picture later. But I really am liking the sort of trumpet flower look that it is getting and I am contemplating not actually adding the second faux skirt. 


This is the top skirt all bustled up, and in case anyone was wondering, the beautiful gathering (as seen below) was fucking difficult as all get out. And I really hated doing it, but when I got it done it looked awesome.

LOOK AT MY BEAUTIFUL GATHERING. LOOK AT IT 

That was all the progress made tonight, now it is going on 1:30 in the morning, I am a bit tired and I think I am going to bed. 

Much love! Happy cosplaying
--Max 

Sunday, July 27, 2014

CosLog: The NYE Installment #1

Hello everyone!
I hope everyone had been enjoying their summer, planning and building for whatever convention is next for you. I know many of my friends are attending Nan Desu Kan in September, I unfortunately will not be in town as I shall be moving to Chicago in August.
However, college is not going to stop my cosplaying. While I cannot plan for NDK 2014, I will be attending the NDK New Years Eve ball this winter. And that, my friends, is what brings us here today.
May I present to you....
*trumpet noise of victory*
The Modern Victorian Ball Gown Project!

This is the general design for the whole thing. I am going to sew the two skirts together, the one that bunches at the seams and the one that has ruffles along the bottom. This means the bottom skirt will be more of a faux skirt. Both of these will be sewn onto the petticoat pictured below. 


This petticoat is made of a whole bunch of lavender tulle, and is actually the bottom of some dress from some garage sale ages ago. It is being repurposed into a petticoat because it is fluffy as shit. 

This is the fabric that will be used as the fake bottom skirt, it is a cotton blend that is the same lavender purple as the tulle. It will have a contrast against the satin that is being used for the top skirt and bodice. I also know that it will be able to create some kick ass ruffles for the bottom of the skirt. 


The first two panels of the top skirt being pinned together 


This is just a better picture of the beautiful purple satin for the top skirt and bodice. I found it in my room after I cleaned for moving out. There was tons of it so I decided I would use it to make this dress.


Three panels pinned together! 


All four of the panels are pinned together and I am going to start sewing after dinner. The dimensions are about 27" for the top curve, 82" for the bottom curve and right now (before hemming) it is 42 inches long. I plan to have this done before I leave to college in less than a month so I can have it be NYE and not have to worry. I will post more pictures and such after I sew it together and put the ties in so that it will punch properly. The bodice of this dress is going to be separate since the waist of the skirt is so high. 

Much love! Happy Cosplay

--Max

Tuesday, June 17, 2014

CosLog 6!

Hey guys! 
Last post! Only pictures of everything! YAY

Boba Fett

Kiki's Delivery Service: Kiki, Tombo and Ursula 

WoW Blood Elf -- Photo by FinalEVA

WoW Blood Elf (Fighting Stance) -- Photo by FinalEVA

TMNT hat that I got from the Con!!

I hope you all enjoyed my adventure in cosplay, hopefully there will be more in the future. I will see you when I start the next convention! 

Keep well and continue cosplaying
--Max

Wednesday, June 11, 2014

CosLog 5!

Hello everyone!
So instead of separating everything in two separate posts I am going to shove everything I have done in the last three days in one post and it will be magically long and mostly coffee fueled. So buckle the fuck up and get ready for some cosplay progress. 

First, I put together my Kiki dress and located shoes, so her entire costume is done because I have the bag and the broom already. I am in the process of sewing a Jiji doll as I am typing this (mad multitask skills) so that will finish up the entire costume. For anyone who is wondering my dress is made of broadcloth, the shoes are just red flats, the wig was Cindy 1B from The Wizards Chest and the bow is a piece of fabric, tied and glued onto a headband. Here is a really shitty bathroom mirror picture that will have to suffice until I have my mom take pictures of everything tomorrow. 


Next, this is Boba Fett. All of the armor is done in 6mm craft foam, coated in gesso, and then painting with acrylic paints. Then it was hot glued into place while it was on my body. It was hot and not fun, but it is done which is awesome. I also have pants and a brown belt that are being finished up right now. I have not found knee pads and I might just go without them because at this point screw it, the thing looks awesome and I look hella rad. Here is a picture!

I also weathered all of my armor for the blood elf. Weathering makes a huge difference in adding depth to your costumes without too much work. It gives your costume a used look and adds profile to it when taking pictures. Also, when you weather, you can alter the character of your armor. In my case I made mine look more like I came out of a game by making my black lines nice and harsh along the details, as if I walked off a computer screen. Here is a picture of the difference between weathering and not weathering. 

And, as I finish typing this, I finished Jiji. He is made mostly of  old tee shirt but he is super cool and incredibly cute. Here is a picture of my new little kitty friend. 


As I said, this was long, but everything is done. I hope you all enjoyed this. Next will be good pictures of everything and then pictures from the convention! Yay. 

Keep cosplaying my lovelies.
--Max


Friday, June 6, 2014

CosLog 4!

Hello!
I know that I JUST posted CosLog 3 but that was supposed to be uploaded a couple of days ago when I actually did those things. This is what I did today! So, awesome I guess. We last had a whole bunch of gessoed pieces, now everything has a coat of red paint and only three things don't have the gold on it. So everything looks roughly like this


This post is going to be nice and short because I did nothing but paint, so there isn't much to tell you. The red is an apple red spray paint Rustoleum, that I just sprayed over everything as a first coat. Then there is a gold metallic color (also by Rustoleum) that I had to paint on because taping out everything that was red was something that was not going to happen. I just used one of the cheap little plastic brushes and a cup. Which I threw away, because you cannot, I repeat CANNOT get spray paint out of a paint brush. Just doesn't work. 

Tonight and tomorrow I plan on working on the sewing parts I have left, just to take a break from the armor. Then on Sunday I will finish painting this and gesso all of the Boba Fett armor, which has less pieces but more colors of paint that I do not have currently (oops).

Have a good day and keep cosplaying
--Max